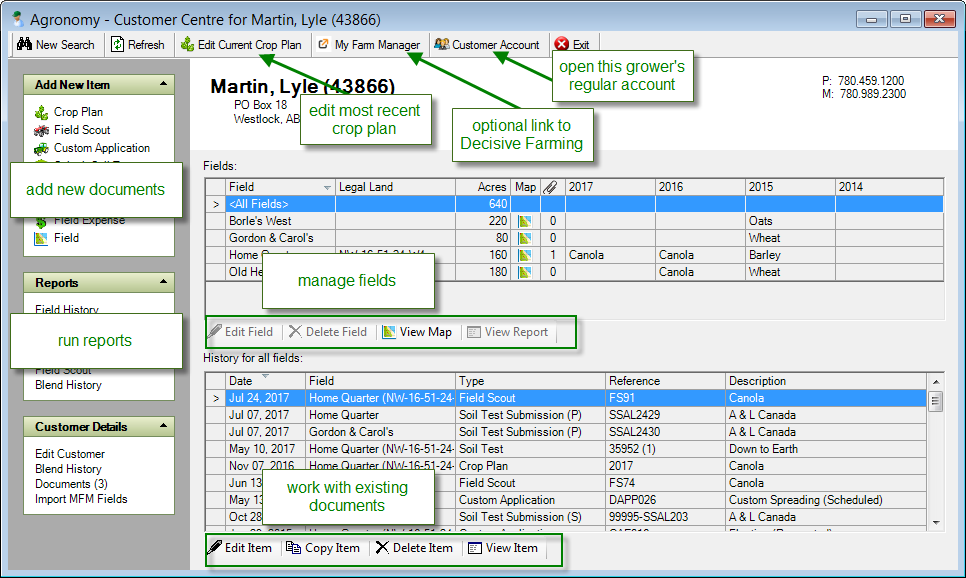
The Agronomy Customer Centre window is where you can perform most agronomy tasks for a customer. Working much like the Customer Account on the AR side, the Agronomy Centre tells you at a glance what fields a customer has and what has been done to them.
More detailed information about how to perform each task can be found in its respective topic. The one task you cannot do from the Agronomy Centre is retrieve lab test results. Test results are downloaded (or imported) from the Soil Tests window.
To open the Agronomy Customer Centre navigate to Agronomy > Agronomy Customer Centre. Or you can add a shortcut button to open the Agronomy Centre from the toolbar.
If you select <All Fields> in the top grid, you'll see history for all fields in the bottom grid. To view One Big Map, select <All Fields> and click View Map.
If you select a single field in the top grid, you'll see history for only that field in the bottom grid.
To view a detailed report for an item, select the item and then click View Item. To edit or delete items, select the item and then click Edit Item or Delete Item.
If you select a field before adding a new Field Scout or Custom App, the field will be copied over. If you use A&L, it will work the same for Submit Soil Test too.
Navigate to: Agronomy > Agronomy Customer Centre
Tip
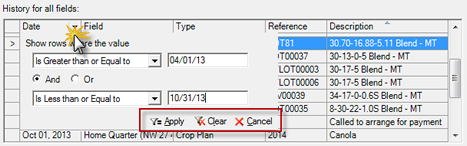
You can apply filters to any column to narrow
the list down to just the documents you want to see. Clear the
filter when you want to see all items again.
Agronomy Documents
Documents can be attached to fields, crop plans, or field scouts. Attaching files in agronomy is done the same way as in the CRM Document manager, and the files can also be accessed from the Documents tab on the Customer Account or from the Document Manager (File > Manage > Documents).