Use the Add Purchase Invoice window to add purchase invoices for:
operational expense (non-inventory) items
inventory items
cost adjustment items (e.g., rebates and freight charges)
Note
Product Returns: Use purchase invoices to record returned items by entering a negative quantity (non-inventory returns) or by importing an inventory receipt with a negative quantity (inventory returns). Click Show Details to view costing information.
Click the Documents button to attach a file to the purchase invoice.
What you'll find:
Related topics:
To add a purchase invoice
* indicates a required field
Navigate to Accounts Payable > Purchase Invoices. Or click the Purch. Invoice toolbar button.
The Purchase Invoices window opens and all purchase invoices created today are listed.
Click Add.
The Add Purchase Invoice window opens.
In the Supplier* box, enter the supplier’s name.
Tip
Click Find to search for a specific supplier or click Add to add a new supplier.
In the Invoice Date* box, today’s date is selected by default.
In the Due Date* box, optionally change the date that the purchase invoice is due.
The default due date is set up in the supplier account. The Due Date must be on or after the Invoice Date.
Note
If you manually change the Due Date, and then manually change the Invoice Date, the Due Date will remain the same.
In the Reference Number* box, enter a specific reference number, usually from the supplier’s invoice.
- or
Check Auto to have agrē assign the next sequential purchase invoice reference number.
Each Purchase Invoice requires a unique reference number for future tracking.
(Config U, U In the Location* box, enter the location that owns the purchase invoice.
This location does not affect GL postings.
In the Comments box, enter comments for the printed Purchase Invoices.
Note
Each purchase invoice may include a combination of operational expenses (non-inventory), inventory purchases, and/or cost adjustments. The operational expense items that you add to the purchase invoice may be added to the purchase invoice directly or be pulled into the purchase invoice from existing purchase orders.
Tip
To change the order of items listed in a product grid, select the item and press Control+Up Arrow or Control+Down Arrow, or right-click and select Move Row Up or Move Row Down.
Adding Non-Inventory Purchases (operational expenses)
Add operational expense (non-inventory) items to the purchase invoice
- or -
Purchasing Fixed Assets on Purchase Invoices
- or -
Link to existing purchase orders.
- or -
Import operational expense items into purchase invoices
Adding Inventory Purchases
Import inventory items (or purchases) from inventory receipts
- or -
Add inventory items to the purchase invoice.
- or -
Link to existing purchase orders.
Adding Cost Adjustments
Add cost adjustment items to the purchase invoice
- or -
Link to existing purchase orders.
Operational Expenses/Non-Inventory Purchases
Non-inventory purchase invoices are used to manage expenditures, including services and operational expenses (e.g., utility bills).
Because operational expense items are not received with inventory receipts (i.e., they are not in your inventory), they can be added to the purchase invoice directly or be pulled into the purchase invoice from existing purchase orders.
Tip
Copy an existing purchase invoice and all non-inventory products, along with their corresponding taxes, will be added automatically to a new purchase invoice (links to purchase orders will not be copied).
agrē also allows you to create a spreadsheet template to use for entering non-inventory purchase details, then imports the values from the spreadsheet into your database as purchase new non-inventory purchase invoices.
what you'll find in this section:
Adding Operational Expense (Non-Inventory) Items to Purchase Invoices
To add an operational expense item to a purchase invoice
* indicates a required field
Ensure the mandatory information (and optional information, if needed) is completed on the purchase invoice.
On the Add Purchase Invoice window, click the Non-Inventory Purchases tab and then click Add Row.
The Add Non-Inventory Row window opens.
In the GL Account* box, optionally change the GL expense account for this item to be posted to.
The GL account specified in the supplier account Details section is entered by default.
Tip
Click Add to add a new GL account.
In the Description* box, optionally change the description of the operational expense item.
The name of the selected GL account is entered by default, but can be manually changed.
If you change the GL account, you'll be prompted to change the description to the name of the new GL account.
In the Quantity* box, enter the quantity specified on the supplier’s invoice.
The value can be positive or negative. Negative quantities are used to record returned operational expense items.
Thresholds may apply.
In the Unit Price* box, enter the price per unit of the item from the supplier’s invoice.
The value can be positive or negative (i.e., credit).
Note
If the non-inventory purchase is linked to a purchase order and PO Unit Price Match is turned on, the Unit Price on the PI must match the Unit Price on the PO. You will receive a message if they don't match. If you have security permission, the Unit Price can deviate (based on the permission allowed - Threshold Limit or Override completely).
The same goes if PO Unit Qty Limit is turned on. You'll need security permission to take more than the Quantity Remaining on the PO (within the Threshold Limit or Override completely depending on which permission the user has).
In the Line Total box, optionally change the total cost of the item to match the supplier’s invoice.
The quantity multiplied by the unit price is entered by default; however, the supplier may have rounded the cost or included other variables, requiring you to change the line total to match the supplier’s invoice.
Check the GST Applies box if GST applies to this item.
If the GST Applies check box is checked, the Taxes Included check box becomes available.
Check the Other Tax box if another tax applies to this item, then select the applicable tax (e.g. PST) from the drop down list beside it.
The Other Tax will be posted to the same GL as selected for the product (e.g. Office Supplies). If the Other Tax check box is checked, the Taxes Included check box becomes available.
Tip
If the Other Tax dropdown doesn't display the tax you need, you'll need to edit the tax settings to make it visible here.
Check the Taxes Included box if the Line Total includes tax.
Checking Taxes Included will change the unit price by the amount of tax. The Gross Total field becomes available.
Edit the Gross Total if necessary.
Due to rounding (say, from a 7% tax) the calculated total may be slightly different than what is printed on the purchase invoice.
Enter any Line Comments.
In the Reference box, enter the supplier’s code for the item from the supplier’s invoice.
Note
The Location and Project boxes are only available for GL accounts that begin with 4 (Revenue), 5 (COGS), or 6 (Expense).
Locations are used for GL postings. If a location is not specified, it is posted as unallocated. You can report on unallocated locations too.
Selecting Clear Distribution empties the Location field.
In the Location box, click the down-arrow to select a single location that you want the item to be associated with
- or -
Click Location Distribution to allocate to multiple locations (the line total will be allocated as per the percentages specified).
The Location Distribution window opens.
Choose a Location Distribution from the drop-down and click Distribute.
The default locations and percentages are shown.
Click OK to distribute the expense. Click Cancel to disregard.
Note
(Config C) A location may be mandatory and/or may default to the header location.
(Config C) In the Project box, enter the project that you want the item to be associated with.
When you associate the item with an active project, the revenue and cost of goods sold postings are also associated with the project. If the item is already associated with a default project (set up in Manage Products), then the default project is selected by default.
Tip
Click Add to add a new project.
In the Fixed Asset box, enter the fixed asset that you want the item to be associated with.
When you associate the item with a fixed asset, the expense postings are also associated with the fixed asset.
Click Update.
The Add Non-Inventory Row window closes and the item appears in the list on the Add Purchase Invoice window.
Notes
The Total Non-Inventory box displays the running total of operational expense items added to the purchase invoice. The Total Purchase Invoice box displays the running total of the payables added to the purchase invoice.
You may want to apply supplier credits.
Tip
After you’ve added items to a purchase invoice, you may want to associate the items to an existing purchase order before saving, as though you had imported the items directly from the purchase order.
Click Save.
Linking to Existing Purchase Orders on Purchase Invoices
When you link to existing purchase orders from purchase invoices, you are associating items on the purchase invoice to those same items on the purchase orders. In order to link, the billing units for an item on a purchase invoice must match the units specified for the item on the purchase order.
When the purchase invoice is saved, information on the purchase order and purchase invoice is updated: the referenced purchase order is updated to reflect the quantity taken on the purchase invoice, and the location of the item on the purchase invoice is changed to match the location of the item on the purchase order.
To link to an existing purchase order
Ensure the mandatory information (and optional information, if needed) is completed on the purchase invoice.
On the Add Purchase Invoice window, click the Non-Inventory Purchases tab.
The Non-Inventory Purchases tab is selected by default.
Click Add Row.
The Add Non-Inventory Row window opens.
Add operational expense (non-inventory) items to the purchase invoice.
In the Item list, select the item you want to link to the purchase order item and then click Link to PO.
The Purchase Order Link window opens.
Check Include Expired Purchase Orders if you've chosen to allow linking to active expired purchase orders, and want to do so now.
Expired purchase orders are listed in red.
If there are no active rows (items) on purchase orders for this item and supplier, the list is blank and the message “No Lines found” appears in the bottom left corner. Click Exit to go back to the Add Purchase Invoice window. If you imported items from a purchase order into the purchase invoice, the Link to PO button is unavailable for those items since they are already referencing a purchase order.
Note
Each row in the list is an operational expense (non-inventory) item on a purchase order. The reference number indicates which purchase order the item belongs to; therefore, if multiple items have the same reference number, they exist on the same purchase order. When you link to them, the purchase order reference number displays in the Item list.
Additionally, items that are set to prepaid on purchase orders are automatically available to be prepaid on purchase invoices when they are linked to (unless you have insufficient prepayment funds).
Select the Include completed purchase order lines check box and then click Refresh List if you want items with a completed status to appear in the list and be available to link to.
In the Purchase Order Item list, select the item to link to the purchase invoice item and then click Use Selection.
The Purchase Order Link window closes and the PO Reference column is updated on the Add Purchase Invoice window.
Note
If the quantity you enter for the purchase invoice item is greater than the quantity available for the purchase order item, a message appears asking if you want to exceed the ordered quantity. When the quantity received is equal to or greater than (overfills) the quantity ordered, the status of the item is changed to complete. Click Yes to exceed the ordered quantity, or click No to cancel.
Click Save.
Importing Operational Expense Items from Purchase Orders into Purchase Invoices
Operational expense (non-inventory) items can be pulled into purchase invoices from existing purchase orders.
When adding a non-inventory rows, a visual indicator  blinky displays next to the Import PO button if the supplier has active rows on existing purchase orders (hover over the icon to see how many).
To import an operational expense item into a purchase invoice
Ensure the mandatory information (and optional information, if needed) is completed on the purchase invoice.
On the Add Purchase Invoice window, click the Non-Inventory Purchases tab.
The Non-Inventory Purchases tab is selected by default.
Click Import PO.
The Import Non-Inv Purchase Order Lines window opens, and active (unbilled) items on purchase orders for this supplier dated in the last year are listed.
Check Include Expired Purchase Orders if you've chosen to allow linking to active expired purchase orders, and want to do so now.
Expired purchase orders are listed in red.
Note
Each row in the list is an operational expense (non-inventory) item on a purchase order. The reference number indicates which purchase order the item belongs to; therefore, if multiple items have the same reference number, they exist on the same purchase order. When you import them, the purchase order reference number displays in the Item list.
Additionally, items that are set to prepaid on purchase orders are automatically available to be prepaid on purchase invoices when they are imported (unless you have insufficient prepayment funds).
Tip
Click on the column headers to change the sort order.
You can narrow the list of items by changing the criteria under Order Date Criteria (purchase order date), GL Account, and Other Criteria (status and location) and then clicking Refresh List (keyboard shortcut for Refresh is F5). If you have items selected in the list, clicking Refresh List clears the items and replaces them with the new results. A message appears asking you whether you want to proceed. Click Yes to refresh the list and clear the lines, or click No to return to the Import Non-Inv Purchase Order Lines window and keep the selected lines (by not refreshing the list).
In the first column with the check boxes, select all the check boxes of the items from purchase orders that you want to pull into the purchase invoice.
Tip
To quickly select and clear all the items in the list, click Select All and Deselect All.
Click Use Selected Rows.
The Import Non-Inv Purchase Order Lines window closes and the selected items are shown in the Add Purchase Invoice window. If you do not have a GL account specified for an item, a message appears reminding you that a GL account is required for the item in order to save. Click OK to continue.
Click Save.
Inventory Purchases
Inventory purchase invoices are used to record the dollars payable to suppliers for inventory items. Although an inventory product can arrive with or without an inventory receipt, all inventory items must first be added to inventory receipts before a purchase invoice can be saved.
If a product arrives with an inventory receipt (the purchase invoice to arrive at a later date), the inventory receipt is entered on the Add Inventory Receipt window. When you add the purchase invoice, the items in the inventory receipt can be pulled into the purchase invoice.
If a product arrives with a purchase invoice (no prior inventory receipt exists), an inventory receipt must still be added before the purchase invoice can be saved. In this case, however, the Add Inventory Receipt window can be accessed on the Add Purchase Invoice window (for ease of data entry). The new inventory receipt will default to the same date as the purchase invoice, but can be changed. When the inventory receipt is saved, the products in it are automatically pulled into the purchase invoice.
what you'll find in this section
Importing Inventory Items from Inventory Receipts into Purchase Invoices
All inventory items must first be added to inventory receipts before they can be billed.
If an inventory receipt already exists for the selected supplier, then the items on the inventory receipt can be imported into a purchase invoice.
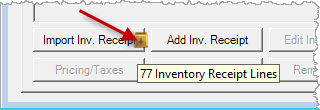
When adding a Purchase Invoice a visual indicator  blinky displays next to the Import Inventory Receipt button if the supplier has unbilled rows on existing inventory receipts (hover over the icon to see how many).
If the inventory receipt doesn't already exist, you can add one and import the products on the fly from the Inventory Purchases tab.
Product rows imported from an inventory receipt can be changed or removed on the fly if they do not match their related purchase invoices (e.g., change the original quantity received, add another item, change the location) only until the purchase invoices is saved. Additionally, items on an inventory receipt cannot be partially billed.
If the Inventory Receipt was linked to a Purchase Order, the prices for the items on the purchase invoice are updated so that they match the prices quoted on the purchase order. If the purchase order does not have specified prices, the current prices are displayed on the purchase invoice.
To import an inventory item into a purchase invoice
Ensure the mandatory information (and optional information, if needed) is completed on the purchase invoice.
On the Add Purchase Invoice window, click the Inventory Purchases tab. Click Import Inventory Receipt.
The Import Rows window opens and active items on inventory receipts for this supplier dated in the last six months are listed.
Check Include Expired Purchase Orders if you've chosen to allow importing from active expired purchase orders, and want to do so now.
Expired purchase orders are listed in red.
Note
Each row in the list is an item from an inventory receipt. The reference number indicates which inventory receipt the item belongs to; therefore, if multiple items have the same reference number, they exist on the same inventory receipt. When you import them, the inventory receipt reference numbers display on the purchase invoice.
Tip
You can narrow the list of items by changing the criteria under Contain (product, product type), Have a date of (inventory receipt date), and Inv Receipt Reference (inventory receipt reference number) and then clicking Refresh List (or using the keyboard shortcut F5). If you have items selected in the list, clicking Refresh List clears the items and replaces them with the new results. A message appears asking you whether you want to proceed. Click Yes to refresh the list and clear the lines, or click No to return to the Import Rows window and keep the selected lines (by not refreshing the list).
In the first column with the check boxes, select all the check boxes of the items from inventory receipts that you want to pull into the purchase invoice.
Tip
To quickly select and clear all the items in the list, click Select All and Deselect All.
Click Use Selected Rows.
The Import Rows window closes and the selected items are shown in the Add Purchase Invoice window.
Tip
After you’ve added items to a purchase invoice, you may want to associate the items to an existing purchase order before saving, as though you had imported the items directly from the purchase order.
Note
You may want to apply supplier credits.
Click Show Details to see more information about the Inventory Receipt or the Purchase Order the product is linked to, or to see costing details.
(optional) Click Split Row if not all units on the inventory receipt have the same cost. This will split the row on the inventory receipt as well.
For example, you receive 10 units in one load, and enter an inventory receipt for 10 units. When you receive the purchase invoice, 6 units have one cost, and 4 units have a different cost. Use Split Row and enter the cost for the corresponding quantity of units.
Click Save.
Adding Inventory Items to Purchase Invoices
To add an inventory item to a purchase invoice on the fly
* indicates a required field
Ensure the mandatory information (and optional information, if needed) is completed on the purchase invoice.
On the Inventory Purchases tab, click Add Inv. Receipt.
The Add Inventory Receipt window opens.
Follow the steps for Adding Inventory Receipts.
Editing Inventory Receipts On the Fly
If you notice an error on an inventory receipt after you've already imported it, you can make some corrections on the fly (or you can abandon the PI and make any corrections by editing the inventory receipt directly instead). The unit cost cannot be edited on the fly as it will soon be replaced by the actual cost on the PI.
Inventory receipts cannot be edited on the fly if the PI has already been saved, or if any rows on the inventory receipt have already been billed.
To edit an inventory receipt on the fly while adding the PI
* indicates a required field
Ensure the mandatory information (and optional information, if needed) is completed on the purchase invoice.
On the Inventory Purchases tab, select a product row to correct and click Edit Inv. Receipt.
The Edit Inventory Receipt window opens.
Make the necessary corrections.
Save the inventory receipt.
The Edit Inventory Receipt window closes.
You will be prompted to import all products.
Select Yes to import all products on the inventory receipt that were not already on the purchase invoice.
Select No to import none.
If a product row was removed from the inventory receipt it will be removed from the PI as well.
If product rows were added to the inventory receipt, a message box appears to remind you that there are products on the inventory receipt that are not on the purchase invoice. You can add those products by clicking Import Inv. Receipt.
Release Number Inventory Receipt (Release # Inv. Receipt)
Using Release # Inv. Receipt is a shortcut to creating Inventory Receipt(s) with the Reference Number as the Release Number, then importing them onto the Purchase Invoice all in one step (Add Inv Receipt + Import from PO at same time). It was designed for direct to farm shipments (product shipped directly to customer from supplier) but can be used for any purchase with a release number.
Release Numbers are required before using Release # Inv. Receipt.
To link add a Release Number Inventory Receipt
Ensure the mandatory information (and optional information, if needed) is completed on the purchase invoice.
On the Add Purchase Invoice window, click the Inventory Purchases tab.
Click Release # Inv. Receipt.
The Release Number - Create Inventory Receipt window opens.
Only Open or Assigned Release Numbers are listed.
Use the Criteria and Other Criteria to optionally narrow down the list of results. Refresh List to see the new results.
Select the Release Number row(s), and optionally edit the Import Quantity (quantity shipped).
Click Use Selected Rows.
The product(s) are added to the Purchase Invoice.
An Inventory Receipt is created immediately for each row selected using the Release Number as the Reference number.
Caution
Removing a row from the Purchase Invoice does NOT remove the Inventory Receipt that was just created on import.
If a mistake was made, like perhaps the wrong release number was selected, the inventory receipt(s) will need to be deleted manually.
The Quantity shipped is drawn down from the Quantity Remaining on the Purchase Order
The Release Number on the Purchase Order is flagged as Filled and cannot be used again.
Linking to Existing Purchase Orders on Purchase Invoices
When you link to existing purchase orders from purchase invoices, you are associating items on the purchase invoice to those same items on the purchase orders. You can link to individual release numbers for an item or the entire item without a release number. In order to link, the billing units for an item on a purchase invoice must match the units specified for the item on the purchase order.
When the purchase invoice is saved, information on the purchase order and purchase invoice is updated: the referenced purchase order is updated to reflect the quantity taken on the purchase invoice, and the location of the item on the purchase invoice is changed to match the location of the item on the purchase order.
To link to an existing purchase order
Ensure the mandatory information (and optional information, if needed) is completed on the purchase invoice.
On the Add Purchase Invoice window, click the Inventory Purchases tab.
Add or import items on inventory receipts as needed.
In the Item list, select the item you want to link to the purchase order item and then click Link to PO.
The Purchase Order Link window opens.
Check Include Expired Purchase Orders if you've chosen to allow linking to active expired purchase orders, and want to do so now.
Expired purchase orders are listed in red.
If there are no active rows (items) on purchase orders for this item and supplier, the list is blank and the message “No Lines found” appears in the bottom left corner. Click Exit to go back to the Add Purchase Invoice window. If you imported items on inventory receipts that are from a purchase order into the purchase invoice, the Link to PO button is unavailable for those items since they are already referencing a purchase order.
Note
Each row in the list is an inventory item (or a release number for an item) on a purchase order. The reference number indicates which purchase order the item belongs to; therefore, if multiple items have the same reference number, they exist on the same purchase order. When you link to them, the purchase order reference number displays in the Item list.
Additionally, items that are set to prepaid on purchase orders are automatically available to be prepaid on purchase invoices when they are linked to (unless you have insufficient prepayment funds).
Select the Include completed purchase order lines check box and then click Refresh List if you want items with a completed status to appear in the list and be available to link to.
In the Purchase Order Item list, select the item or release number to link to the purchase invoice item and then click Use Selection.
The Purchase Order Link window closes and the PO Reference column is updated on the Add Purchase Invoice window.
Note
If the quantity you enter for the purchase invoice item is greater than the quantity available for the purchase order item, a message appears asking if you want to exceed the ordered quantity. When the quantity received is equal to or greater than (overfills) the quantity ordered, the status of the item is changed to complete. If release numbers are used, the status of the release number is changed to “filled”. Click Yes to exceed the ordered quantity, or click No to cancel.
Next Topic: Cost Adjustments
Related Topics: Entering Taxes on Purchase Invoices, Applying Credits on Purchase Invoices, Supplier Payments